Portraiture…The Painting Process
As an Artist the need to explore the limits of our ability can be quite daunting yet exciting and inspiring. We go about our time procrastinating to the point where we question our motives, our abilities and commitment to the tasks and goals which we set ourselves. Sometimes the motivation leaves us temporarily and we feel overwhelmed with mind fog and then it comes….Sometimes through a burst of inspiration, a lucky glance at the right time in the right place or maybe its just a commissioned piece that falls on our lap, but the excitement returns. The sketchbook is opened and we explore the subject, just a pencil sketch in order to get a feel for the composition and how the image translates into an art piece…. and so begins the portrait journey…

I begin the process through exploring the subject and by running out several sketches to gain a feel for what I am looking for. The first image above you can see one of these line drawings which gave me the desired result. Once I am happy with the composition and its fluidity I transfer it to my prepared Panel, I use an MDF panel 3mm thick with 3 coats of white gesso primer, each layer prepared in a cross hatch pattern which enables the texture to morph through later in the painting process. when the panel is dry and ready to use. I apply a very quick wash of oil paint thinned down with turpentine, usually the left over paint from my palette which softens and tones the overwhelming whiteness from the panel, this dries within 10 to 20 minutes and is ready to use.

Tonal Sketch
The First painting draft will consist of applying the basic composition and addressing where the highlights and shadows will be, I use Browns and ochres for this phase never blacks or greys as they are too dominant and opaque. This is the most important stage as it will become apparent quite quickly any flaws in the composition and subject matter as a good composition does not always translate into a viable painting.

Colour Blocking
As I move into the second draft above I try to add some flesh tones in the relevant areas, they may seem over exaggerated at this stage but will be important as the underpainting in future drafts…I use this stage to block in colours and tones, there can be a lot of creative freedom here and it is possibly the most enjoyable stage of the Portrait making process where happy accidents often occur, Paint moves around the panel freely as the soul of the subject attempts to release itself.

Adding Texture
The next draft above is where things can get interesting as I try to address the essence of the subject through brush application of paint and the continuous process of lightly scrapping this paint to create a texture revealing the cross hatch primer of the initial phase, this can be done multiple times until I am happy with the result. Also I add some more prominent flesh tones and bring tonal sharpness to the eyes for the first time.

Soft Blue Tones
Next phase I add some cooler colours, cerulean blue, Naples yellow and titanium white. the cooler colours within the subject creates depth and contrasts, highlighting the warmer flesh tones, again this draft requires a lot of application and scratching to apply the desired effect. I find that the Cooler colours are essential in portraiture as they balance the colour contrasts and bring the composition together. The Cooler background also brings forward the subject more effectively.

Adding Dark Tones
This next draft pulls the whole painting together, it’s tempting to add dark tones early on in a painting but it is better in my experience to hold off until the later drafts. As you can see that the whole composition has been elevated to an entirely new level. Those cool highlights really pop against the new darker tones, I used Paynes Grey as apposed to pure black as it mixes well with Burnt Sienna and Burnt Umber, I quite like to use the richness of Van Dyke Brown also. I added a light brown glaze over the cerulean blue background to add texture.
Bringing in Details
At this point it is necessary to start adding details to begin the conclusion of the composition, this can be a very precarious stage of the painting as things can go very wrong very quickly, the paint brushes and palette knives get smaller and it is quite easy to fall into the trap of over working. At this stage I work intensely but in short bursts to avoid over working. The eyes are the centre of the composition so I work a lot on this, I struggled a lot with the right eye and contemplated leaving it under-painted in an asymmetrical manner but it just didn’t work.

Softening Harsh Shadows
Nearing the end I finally got the right eye fixed and added some more texture to the hair, softened the heavy shadow of the jaw line and eyes always been careful to be consistent with the existing texture. I completed the background colour with a more prominent blue and shadow blend. Also I added some darker reddish tones to the eyes which brought more life and character to the face.

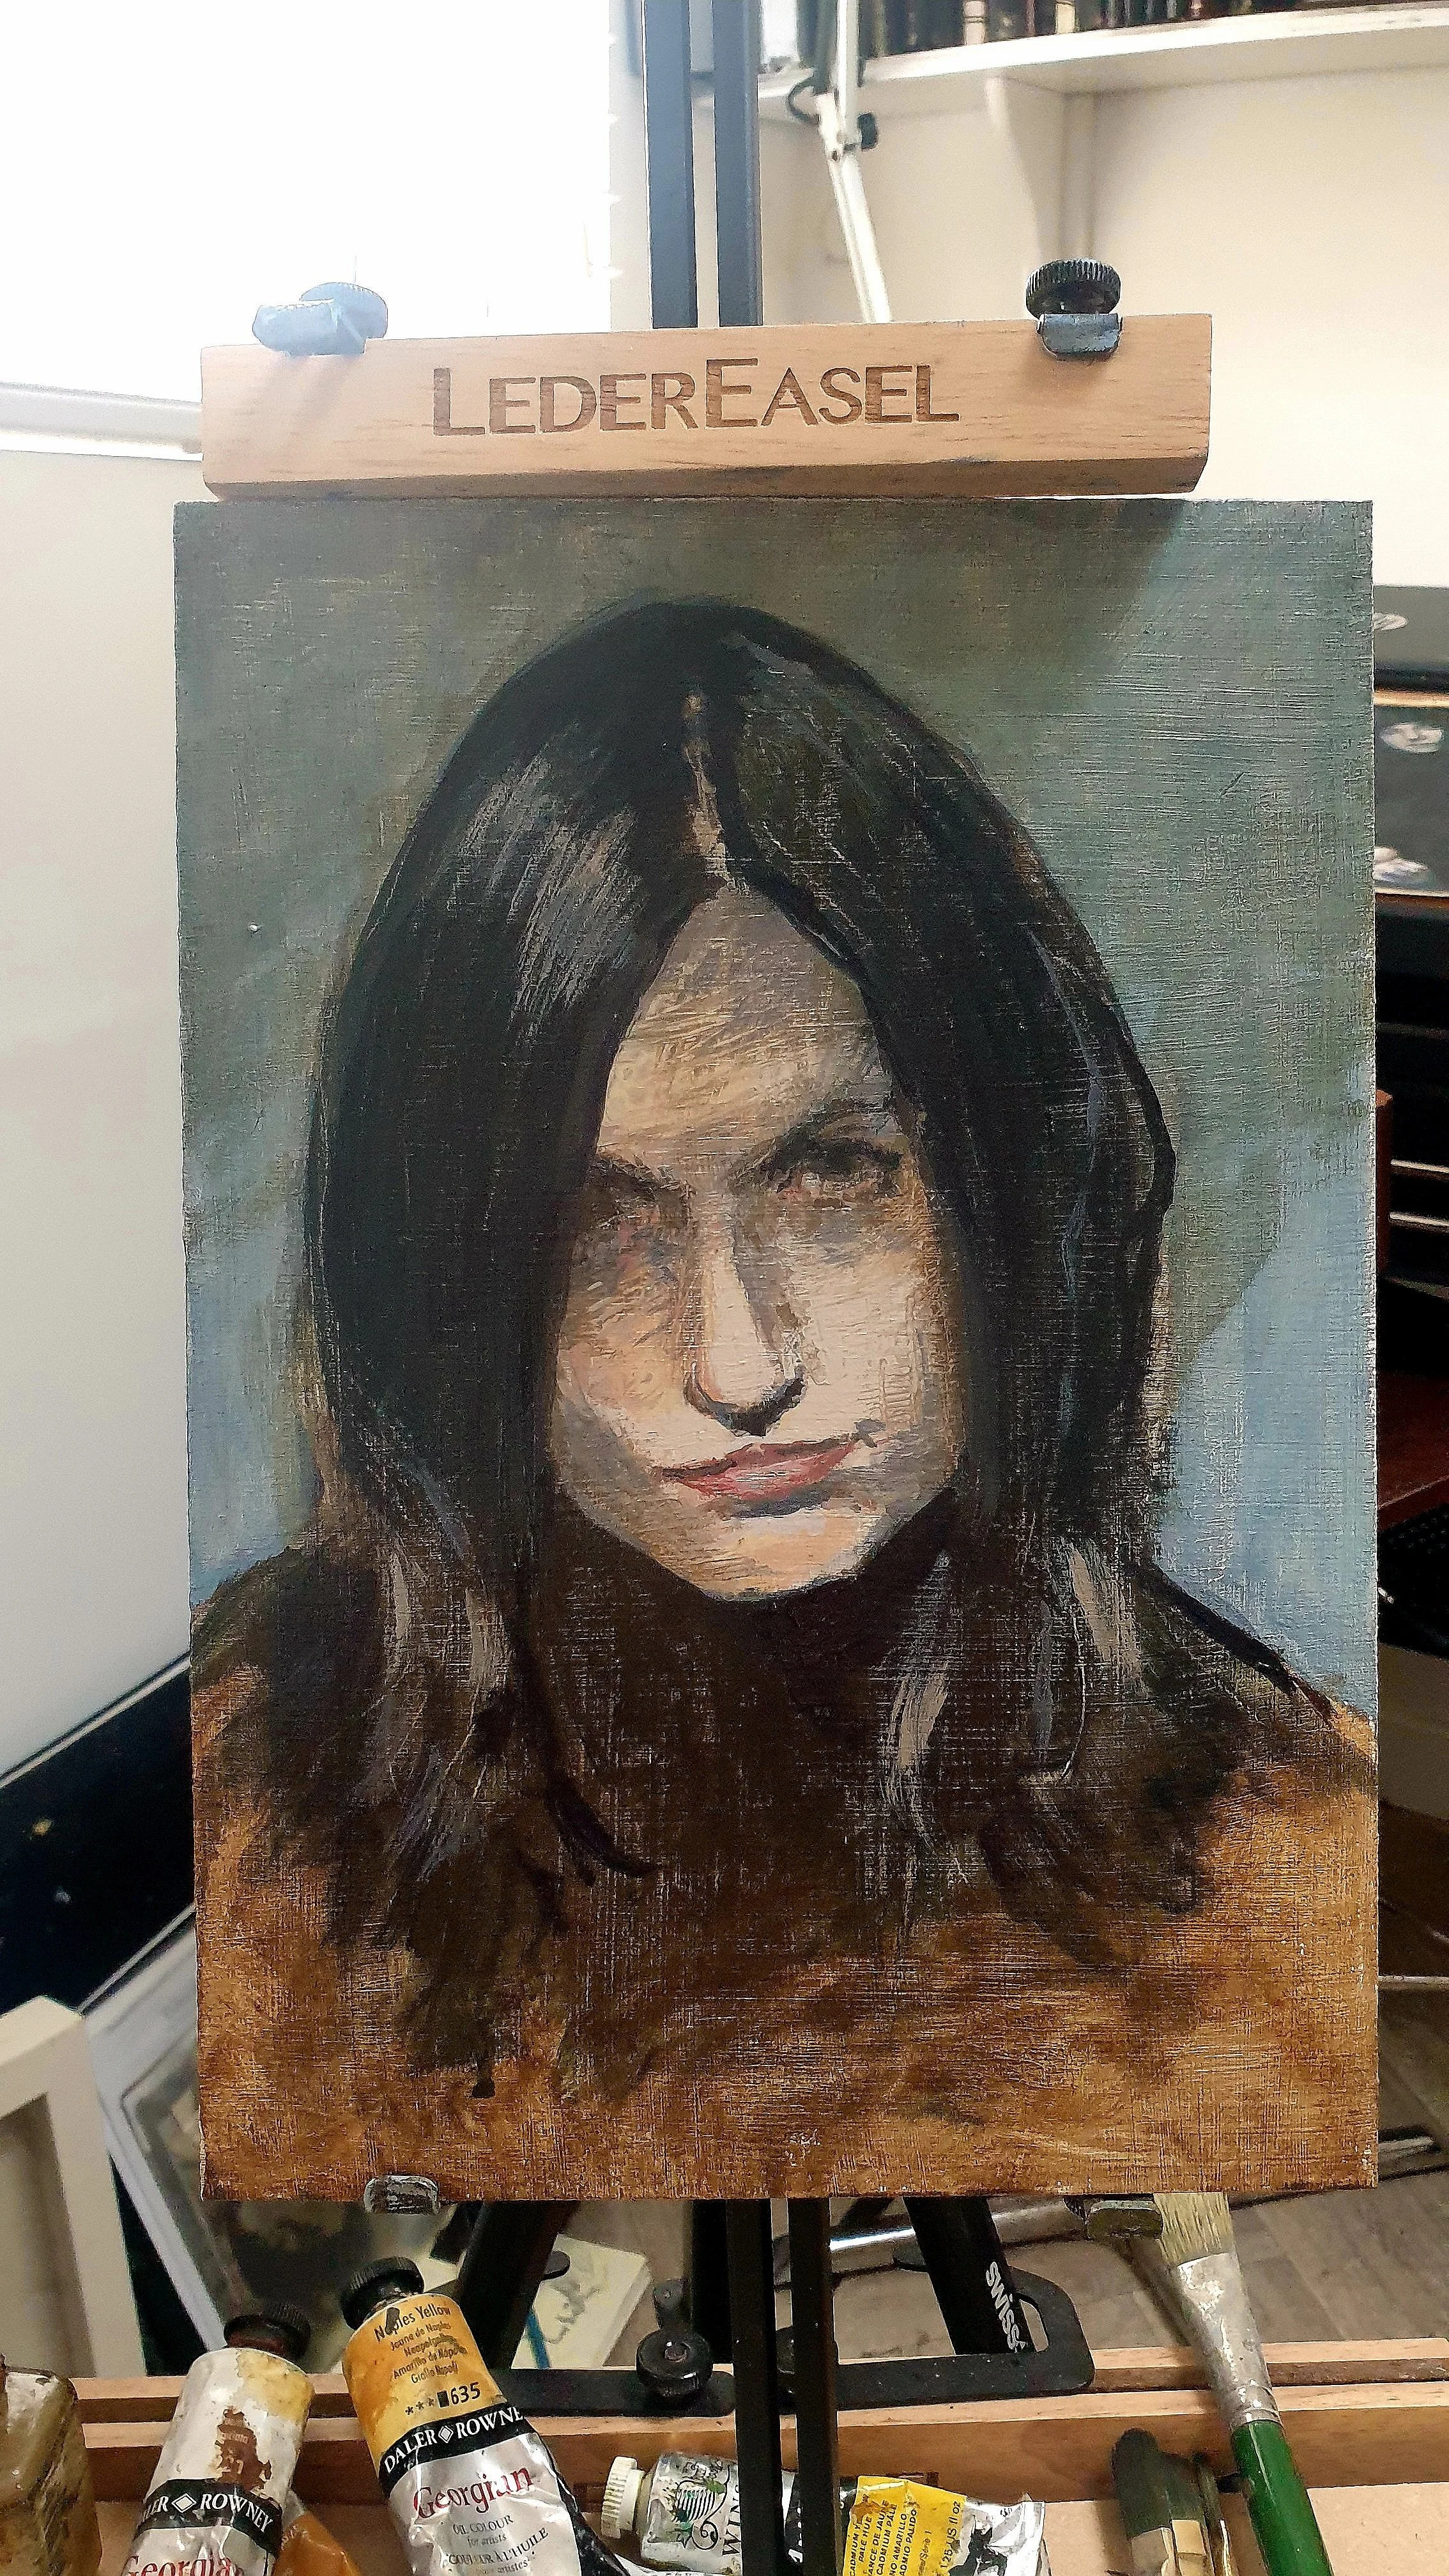
Finishing Touches
At the end stage its just all about the finishing touches, I softened the heavy shadows on the face, continued to add texture to the flesh tones and newer subtle shadows. I concentrated for the most part on detailing the eyes as I felt they required more of a presence. Again it is so important not to overwork things and if I’m happy I will down brushes and leave it, There will always be something that you want to tinker with, in my experience less is definitely more so don’t fall into this trap. I try not to complete a whole painting in the Realist style I will tend to leave the areas that are not prominent in the painting alone and in an underpainted manner. This I feel adds to the presence of the subject and centres the eyes towards the areas that you wish to dominate, as you can see the ground from the first drafts are still visible at the bottom of the panel.
From start to finish the process is quite intuitive and I just judge how and when to change areas I feel need attention. I always work on multiple paintings at once as I feel the need to get away from one painting while jumping into another one, This keeps the mind fresh and focused. Doing this can make it difficult to gauge how long a painting may take to complete, but it is always important I believe to paint inspired for your best results and the exercises which help in this regard I may cover in future blogs. I hope that this Blog has been useful for you and I would be delighted to engage in feedback.